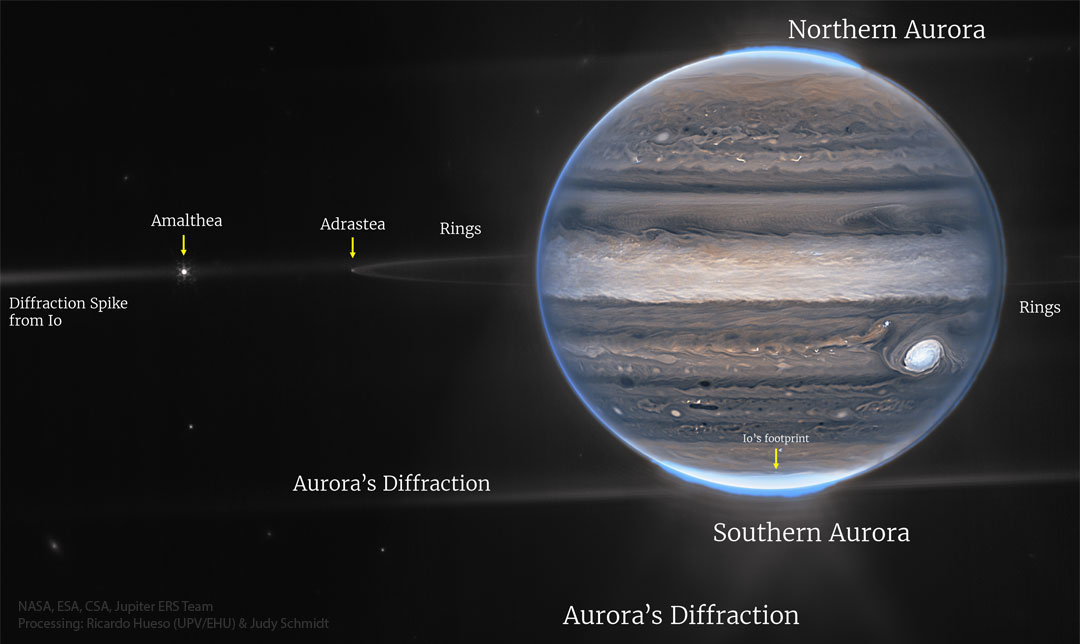
Every new smart-telescope owner points at Jupiter or Saturn the first clear night they have the scope out, and every one of them gets the same disappointment: a bright blob with maybe a hint of a belt if they're lucky. The problem isn't that smart telescopes can't shoot planets. It's that "shoot a planet" and "shoot a nebula" are two completely different jobs, and the app is set up for the second one by default.
Why smart telescopes struggle with planets
Every consumer smart telescope was designed around one job: pulling faint emission from deep-sky objects — nebulae, galaxies, star clusters — against a dark sky. That drives every optical and firmware choice: fast focal ratios (f/3 to f/5), wide fields of view, and multi-second exposures with continuous stacking. The tradeoff is that everything you'd want for a planet — long focal length, high frame rate, sharp central resolution over a tiny field — is the opposite of that.
The physics is unforgiving. Jupiter subtends about 45 arcseconds at opposition, Saturn about 18 arcseconds with rings. To resolve a Jupiter cloud belt cleanly you want an image scale finer than about half an arcsecond per pixel. A Seestar S50 at 250 mm focal length with 2.9 μm pixels gives you roughly 2.4 arcseconds per pixel — one Jupiter belt is maybe four or five pixels wide. That's enough to see the belts, not enough to resolve their structure. The Celestron Origin Mark II, with 335 mm focal length and 4 μm pixels via its RASA optics, does noticeably better but still isn't a planetary rig in the way a small SCT is.
Once you accept that, the game becomes: get the most out of the aperture you have. That's a different workflow.
The planetary mode by scope
Every current platform has a Solar System / planetary mode, but the entry point differs. Don't try to hand-configure planets in deep-sky mode.
| Scope | Mode | How to get there |
|---|---|---|
| ZWO Seestar S30 / S30 Pro / S50 | Solar System target | Sky Atlas → Solar System → Jupiter/Saturn (scope switches modes automatically, tracking rate adjusts) |
| DwarfLab Dwarf 3 / Dwarf Mini | Solar System mode | Top-right mode selector → Solar System → aim manually per DwarfLab's mode docs |
| Vaonis Vespera II / Vespera 3 | Planetary Mode (Singularity app) | Catalog → Solar System → Jupiter/Saturn; live non-stacked view |
| Unistellar Odyssey / Odyssey Pro | Planetary Mode | Catalog → Solar System → target; must use Go-to for the mode to activate |
| Celestron Origin Mark II | Solar System target | Catalog → Solar System; app selects planetary defaults |
Starting settings that work
These are floor values, not final answers — atmospheric seeing dominates everything, and Jupiter and Saturn each want slightly different exposures. Adjust one variable at a time.
| Setting | Jupiter | Saturn | Why |
|---|---|---|---|
| Exposure | 1/500s – 1/125s | 1/125s – 1/30s | Fractional-second shutters freeze seeing. Saturn is dimmer; give it a hair more light. |
| Gain / ISO | 0–20 | 20–40 | Minimum practical. Extra gain is noise, not detail. |
| Filter | UV/IR-cut only | UV/IR-cut only | Never a dual-band or LP filter on planets. Broadband target, filters lose light for nothing. |
| Capture | Video, 30–90s | Video, 60–90s | Lucky imaging territory, not live stacking. |
| Frame rate | Highest offered | Highest offered | More frames = better chance of catching seeing gaps. |
| Tracking | Sidereal (Solar System mode adjusts) | Sidereal | Planetary drift within a minute-long clip is negligible. |
| Format | RAW / FITS if offered | RAW / FITS if offered | Real work happens in post. |
Two exceptions to note. On the Seestar in EQ mode you can use longer exposures, but for planets you never should — bright targets don't benefit from long integration, they benefit from short frames that beat the atmosphere. And DwarfLab's own settings guide recommends leaving the shutter alone after autofocus on the Dwarf 3, because the platform sets it to a sensible value automatically.
Lucky imaging, not live stacking
Once the scope is on Jupiter and dialed in, don't hit shutter. Hit record. Every smart telescope will save a short video (Wi-Fi transfer, SD card, or app export). A one-minute clip at 20–30 fps gives you 1,200–1,800 frames of the same subject, most of which will be softened by turbulence you can't see with your eyes. A small fraction — the "lucky" frames — will be sharp. The trick is keeping only those.
Pull the video off the scope and open it in AutoStakkert! — free, cross-platform, the de-facto standard for planetary and lunar work. AutoStakkert scores every frame for sharpness, picks the top 5–15%, aligns them on features you choose (Jupiter's belts, Saturn's ring edge), and stacks the survivors into a single low-noise image with more detail than any individual frame contained. The stack then goes into a wavelet-sharpening tool — RegiStax or any modern editor with unsharp mask.
This is the same workflow used on our Moon imaging guide — the enemy is seeing, and the fix is the same. It's a completely different approach than the Siril deep-sky workflow, which averages faint signal over hours; planets don't need integration, they need moments.
What you can and can't expect
Set expectations honestly before you shoot.
Jupiter — reasonable to expect: two main equatorial belts (NEB and SEB), a hint of polar darkening, the four Galilean moons as bright dots, the Great Red Spot as a subtle oval when it's on your side of the planet and seeing cooperates.
Jupiter — will not happen on any smart telescope: the fine turbulent structure inside the belts, individual festoons and white ovals, JWST-style polar auroras, moon shadow transits with sharp shadow edges.
Saturn — reasonable to expect: clear ring separation from the planet, the ring plane's inclination, at least Titan visible off to one side, occasional glimpses of the Cassini Division on the very largest smart scopes on a very good night.
Saturn — will not happen: the Cassini Division as a clean sharp gap, storm structure on the planet, multiple moons resolved cleanly.
If those "will not happens" are what you want, no smart telescope will get you there. Buy a small SCT (a Celestron 6SE or 8SE) and a ZWO planetary camera. That combination costs less than a Vespera 3 and outperforms every smart scope on planets by a wide margin. If you want deep-sky and planets in the same rig, a smart scope handles deep-sky well and planets adequately — which is more than a small SCT does going the other direction.
For a fuller decision framework, see the smart telescope buying guide, and if you're weighing the ~$500 tier specifically, the Seestar S30 Pro vs Dwarf 3 comparison covers both platforms' planetary limits directly.
What can go wrong
Every frame looks soft, even the "lucky" ones. Seeing is bad tonight. Nothing you do at the scope will fix a jet-stream night. Come back another evening — the difference between mediocre and excellent seeing is often just two or three nights apart from the same balcony.
Jupiter is a featureless disc even in Solar System mode. Autofocus locked before the planet was fully in frame, or exposure is too long. Refocus manually on the limb (highest contrast), drop the exposure by one stop, and re-record.
Saturn's rings look like a smudge, not a ring. The image scale isn't giving you enough pixels across the planet — this is a hard aperture limit on the smaller scopes (S30, Dwarf Mini). Try a night of good seeing on the largest scope you have; if the limit is still there, it's the optics.
Every frame is blown out white. Scope quietly reverted to deep-sky mode when you slewed. Always confirm the exposure display reads sub-second before you record.