
A question that comes up in every smart-telescope thread on Reddit, Cloudy Nights, and r/AskAstrophotography: is this just a gateway drug to the real thing? For most people, no. For some, yes. This is the comparison that answers it honestly, with the price tags and learning curves spelled out, and no attempt to defend either side at the other's expense.
Short answer
Buy the smart telescope if your goal is to see faint objects, show your family images, and image from a driveway or a Bortle 5–7 backyard. Buy the traditional rig if your goal is to produce individual photographs you'll frame — and if you accept that it will take months before the first one looks the way you pictured. Full breakdown below.
What each side actually costs in 2026
Prices below are retail at the time of writing — verify at purchase since smart-scope pricing moves quickly. The smart telescope representative here is the ZWO Seestar S30 Pro because it is the most direct target of the Fstoppers $700 smart telescope vs $4,000 Milky Way rig comparison, and because at its current price it is the sweet spot where most buyers land for a first smart scope.
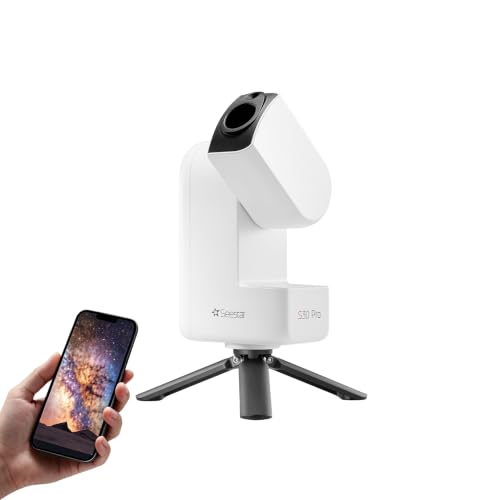 ZWO Seestar S30 Pro30mm triplet apo, 150mm focal length, Sony IMX678 sensor, full smart-scope workflow in one 2.5 kg unit
The traditional rig is harder to price because the components are modular and most people buy them over a year or two. A representative mid-tier starter kit, bought new, lands somewhere around $4,000 all-in. One honest shortcut: if you already own a DSLR or mirrorless body and a fast lens, you can bolt on a small star tracker (the Move Shoot Move Nomad is roughly $330) and shoot wide-field Milky Way with ~$500 of added spend. That is the lower-left corner of the traditional-rig space, and it is what Fstoppers put against the Seestar.
| Line item | Smart scope (Seestar S30 Pro) | Beginner tracker rig | Mid-tier dedicated rig |
|---|---|---|---|
| Optics / scope | included | 85mm f/1.4 lens, ~$600 used | 72mm apo refractor, ~$900 |
| Mount / tracker | included | MSM Nomad, ~$330 | Sky-Watcher HEQ5 Pro, ~$1,400 |
| Camera | included | DSLR / mirrorless (owned) | ZWO ASI533MC Pro cooled, ~$800 |
| Guiding | n/a | n/a | guide scope + camera, ~$280 |
| Filters | solar + light pollution included | optional, ~$150 | dual narrowband, ~$400 |
| Power / cables | internal battery | — | DC distribution, ~$150 |
| Software | native app | Photoshop / Lightroom | NINA + PHD2 free; PixInsight ~$290 |
| Approx. total | $699 | ~$500 added (if DSLR owned) | ~$4,000+ |
The honest take: a smart scope and a well-chosen DSLR-on-a-tracker setup are not that far apart in price if you already own the DSLR. They produce very different images, though — the tracker shoots wide-field constellations and the Milky Way band, while the smart scope images bounded deep-sky targets at 150–350mm focal length.
The learning curve, measured in hours
The thing nobody writes about in gear reviews is time-to-first-image. Here is a realistic accounting.
| Phase | Smart scope | Traditional rig |
|---|---|---|
| Unbox to first setup | 15–30 min | 2–4 hours (balance, polar align, cable routing) |
| First usable image | same night | third or fourth session |
| First image you'd post online | 1–3 sessions | 10–20 sessions |
| Learning polar alignment | — | 2–5 hours spread over weeks |
| Learning autoguiding (PHD2) | — | 3–6 hours |
| Learning processing (Siril / PixInsight) | 2–4 hours for enjoyable output | 10–30 hours for competent output |
A smart telescope compresses almost all of this into app taps. Polar alignment, plate solving, tracking, autofocus, dithering, and dark frames are automatic. The tradeoff is that when something goes wrong — framing is off, stacking drops frames, star shapes look odd — you have fewer levers to pull than on a modular rig, where you can swap any single component.
The processing step still exists on both. On a smart scope, the FITS or TIFF export lets you take a stacked image into Siril or GraXpert exactly like a traditional-rig output; see our smart-telescope Siril workflow and GraXpert gradient-removal walkthrough for the specifics.
Image quality: where the gap is real and where it isn't
The traditional-rig advantages that genuinely matter: a 70–80mm apo collects four to seven times the light of a 30mm smart scope and resolves finer detail on galaxies and planetary nebulae, so on a target like M51 or M57 the gap is unmissable; narrowband flexibility lets you swap in Ha, OIII, and SII filters for the Hubble palette, which the Dwarf 3 and the Vespera line only partially close with dual-band smart-scope filters; long focal length (400–1000mm) favors small bright targets like the Ring or Crab nebulae; and under Bortle 2 skies the traditional rig scales to pull faint integrated flux a smart scope never will.
The smart-scope advantages that genuinely matter in return: a $4,000 traditional rig in Bortle 7 skies still fights gradients and sky glow, while a smart scope with a built-in light-pollution filter and 10-minute stacking cycles makes Bortle 7 workable for most emission nebulae; the S30 Pro's native field at 150mm covers large targets (North America Nebula, Andromeda) in a single frame, where a dedicated rig at 700mm turns those into mosaic projects; and you get an image almost every clear night, where on a modular rig cables, drivers, and plate-solve failures routinely burn whole sessions.
Fstoppers' side-by-side test under New Mexico skies landed on this: the gap is smaller than the price suggests, and the choice between them is more about workflow than image quality. We would add that at Bortle 5 and worse — which covers roughly 80% of the US population — the smart-scope workflow often produces better finished images than a traditional rig running in the same conditions, because the traditional rig is fighting the sky and the smart scope was designed for it.
The upgrade path (and whether to take it)
The usual question: "If I buy a smart scope now, am I going to want to spend $4,000 later anyway?" Most owners do not. The ones who do tend to already own a DSLR and have a wide-field itch the smart scope's narrower FOV can't scratch; want to shoot specific small targets (small galaxies, planetary nebulae) at longer focal length; or enjoy the gear side of the hobby — autoguiding, flats, calibration — as its own hobby.
If you fit all three of those, start with a star-tracker rig or a used entry-level mount and a 72mm apo. If you fit the first one only, buy the smart scope — the dark-sky companion to your DSLR work will serve you well for years. If you fit none of them, the smart scope is the whole hobby for you, and that is a perfectly good place to stop. See the full price-tier breakdown for which smart scope matches which buyer, and the first-night guide for what to expect on arrival. For the filter story that separates smart scopes from each other, see our smart-telescope filters explained write-up.
Bottom line
Smart telescopes and traditional rigs are not competing products — they are adjacent ones. A smart telescope is a camera that happens to be an observatory. A traditional rig is a photography platform that happens to be pointed at the sky. Buy the smart telescope if you want images without becoming a technician; buy the traditional rig if becoming the technician is part of the appeal.
The Fstoppers piece makes one additional point worth borrowing: the $4,000 traditional rig in that comparison relied on a camera and lens the author already owned. Priced from zero, the gap widens to seven to ten times, not five times. Priced from "I already own a Canon R and a Sigma lens," the gap narrows to under two times. Where you fit on that spectrum changes the answer more than any image quality argument.